This topic walks through the steps required to convert a single-language add-in to support multiple languages. The examples below assume that the name of the addin is MyAddin.
1. Review your function categories
Look at each of the categories you have chosen for your add-in functions. If you can use a standard (built-in) category, then do so. You will not have to do any further work to localize built-in categories.
See Stability : Category for more information.
2. Create a string table resource
In Visual Studio 6, use the Insert/Resource... menu, and select "String Table", as shown below.
In Visual Studio .NET or Visual Studio 2005, select the resource file MyAddin.rc in the Resource View, and use the Edit/Add Resource... menu, and select "String Table", as shown above.
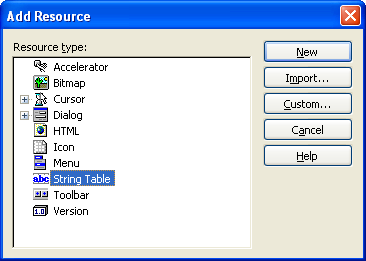
Press "New" to add the resource. It will be added in your default language. If necessary, you should change it's Language property to match the current language of your add-in.
3. Replace hard-coded strings
Look through your code, and copy any strings you find to your new string table resource. Replace the existing string with a resource id. In particular, look at the strings discussed below.
Library name
The library name is declared near the top of your main .cpp file, and contains the name you selected in the XLL+ AppWizard when you created the project.
 CopyC++
/* static */ LPCTSTR CMyAddin::m_pszDefName = "New XLL";
Add a new string to the string table.
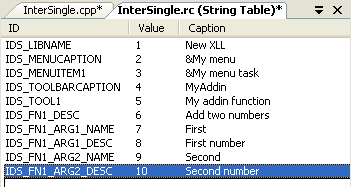
In Visual Studio .NET or or Visual Studio 2005, fill in the columns of the string table as shown in the example below (obviously, you should replace "New XLL" with the display name of your add-in).
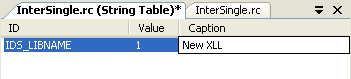
Change the library name definition as follows.
CopyC++/* static */ LPCTSTR CMyAddin::m_pszDefName = _T("#1");
Menus
If you have included a menu in your project, replace the strings with resources. For the following menu:
CopyC++m_menu.SetTexts(_T("&My menu")); m_menu.AddItem(_T("&My menu task"), _T("MyAddinFunction")); m_menu.Create();
Add these resources:
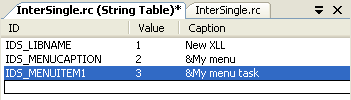
And amend the code as follows:
CopyC++m_menu.SetTexts("#2"); m_menu.AddItem("#3", "MyAddinFunction"); m_menu.Create();
Toolbars
If you have included a toolbar in your project, replace the strings with resources. For the following toolbar declaration:
CopyC++/* static */ LPCTSTR CMyAddinApp::m_pszToolbarName = _T("MyAddin"); BOOL CMyAddinApp::OnXllOpenEx() { ... CXlToolbar::AddToolbar(m_pszToolbarName); CXlToolbar::AddTool(m_pszToolbarName, 1, _T("MyAddinFunction"), _T("My addin function")); CXlToolbar::SetToolBitmap(m_pszToolbarName, 1, IDB_BITMAP1); CXlToolbar::ShowToolbar(m_pszToolbarName, true, CXlToolbar::DockRight); ... }
Add these resources:
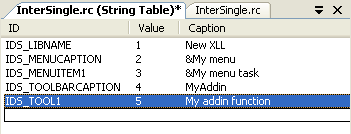
And amend the code as follows:
CopyC++/* static */ LPCTSTR CMyAddinApp::m_pszToolbarName = _T("#4"); BOOL CMyAddinApp::OnXllOpenEx() { ... CXlToolbar::AddToolbar(m_pszToolbarName); CXlToolbar::AddTool(m_pszToolbarName, 1, _T("MyAddinFunction"), _T("#5")); CXlToolbar::SetToolBitmap(m_pszToolbarName, 1, IDB_BITMAP1); CXlToolbar::ShowToolbar(m_pszToolbarName, true, CXlToolbar::DockRight); ... }
4. Localize add-in functions
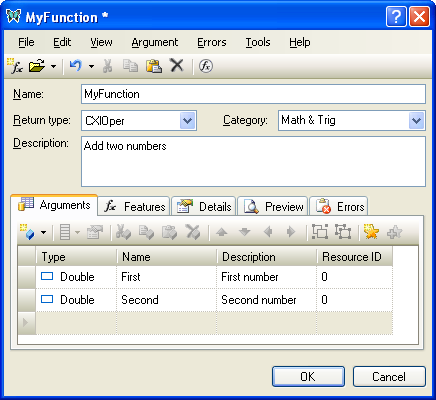
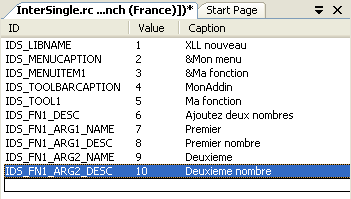
Use the XLL+ Function Wizard to inspect each of your add-in functions. Copy the function description and each argument name and description to the string table.
For a function which initially looks like this:
Add strings to the string table as follows:
Then return to the XLL+ Function Wizard and amend the function as shown below:

Notes
- If you can't see the Resource ID column in the Function Wizard, right-click on the argument grid header, and put a check against the View Resource ID Column command.
- The resource ID names used above (e.g. "IDS_LIBNAME", "IDS_FN1_DESC" are arbitrary (but meaningful). These IDs are not usually used in your code - only the numerical version is required.
- The function's name is not localized. See String types : Function Names for an explanation.
5. Test single language version
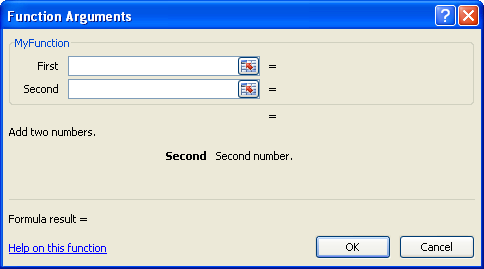
At this point it is worth rebuilding your add-in and testing it. Open your add-in in Excel and use the Excel Formula Wizard to inspect each function's description and argument names and descriptions. The example above should look like this:
6. Add additional languages
To add a new language to the add-in, do the following.
-
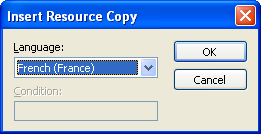
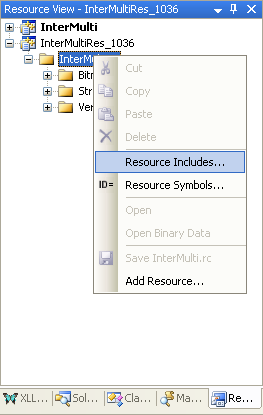
Copy the string table.
You can use the Insert Copy... command by right-clicking on the string table in Resource View.

-
Select the language of the new table in the dialog that pops up.
-
Edit the new string table, and translate each string. Leave the numbers and resource ID names unchanged.
-
Add error messages in the new language, if available.
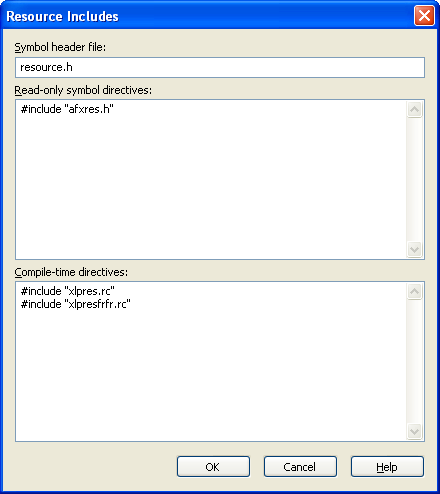
Look in the XLL+ include directory to see if there is a resource file for the new language. Each language file is named
xlpresxxyy.rcwherexxis the language name, e.g.frfor French, andyyis the sub-language name, e.g.frfor France.If the file is present, include it in your resource file by using the "Resource Includes..." command:
Add the language-support resource file, as shown below:
7. Test new language version
- Rebuild your add-in.
- Use the Control Panel Region Settings applet to change your current language to the new language.
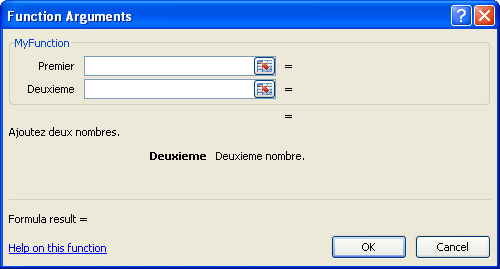
- Open your add-in in Excel. You will see that the menu and toolbar now have new captions.
-
Use the Excel Formula Wizard to inspect each function's description and argument names and descriptions. The example above should look like this:
8. Build resource-only DLLs
An optional additional step is to isolate the resources for each language into a separate resource-only DLL. Under this architecture, the main XLL contains the resources for the primary language of the add-in, and each other language is held in a separate DLL.
See Deployment for a full discussion of this technique.
Next: Introduction to asynchronous functions >>