Extended types
The built-in data types that you can choose for your arguments are limited to simple types, such as Double, String, Boolean or Integer (and arrays of those types).
You can register your own types, with their own validation code, and these types will become available in the Function Wizard and the XLL Add-ins window, along with the built-in types.
When you select the extended type, the input from Excel will be validated and converted to the target type, without the need for the developer to write any validation or conversion code.
A Date type
For example, Excel treats dates and numbers interchangeably
(except that it can display dates in a friendly manner).
So when your function receives a date value, it is passed
as double. The integer part of the value
represents the date, and the fractional part represents the time of day.
You own code may handle dates as integers, perhaps of
type long.
A useful date type might do the following for a date argument ValueDate:
-
Declare a local target variable
 CopyC++
long ValueDate; - Check that the input is a legitimate date (e.g. a number greater than 30000, representing a date value after 18 February 1982), and return an error if it is not.
- Set the local variable ValueDate to the date value.
- Perhaps add a constant to the date value to account for a different base date to Excel's.
All this can easily be achieved by creating and registering a scalar extended type.
Loading an extension file
An extended type is defined in an extension file, and is loaded
using the XLL+ Options - Extensions page. Extension files have the
file extension xpe.
Let us load up a pre-defined date type.
-
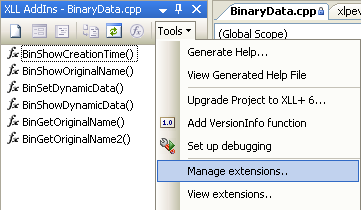
From the XLL Add-ins window, use the "Tools/Manage Extensions" command to open the "XLL+ Options / Extensions" window.
Altenatively, use the Visual Studio Tools/Options menu command to show the Options dialog. In the tree on the left, select the node "XLL+ / Extensions".
-
Click on the "Add" tool to select an extension file to be registered.

-
Navigate to the "extensions" sub-directory of the XLL+ installation directory (e.g.
C:\Program Files\Planatech\XllPlus\6.0\VS8.0\extensions), selectdate.xpeand press the Open button.
-
The file will be added to the list of loaded extension files, as shown below.
