Note: The following topics address the issues that arise when upgrading projects built with earlier versions of XLL+. Click here to skip this section.
Older projects
Version 7 of XLL+ contains some significant changes to its internal architecture. In order to support the new features of Excel introduced in 2010, a number of changes needed to be made.
If you built an add-in using an older version of XLL+, then it will not compile or link successfully using the XLL+ 7 headers and libraries. However, if you run the XLL+ Upgrade Wizard against your project all the necessary changes will be made to your project to allow it to be built with XLL+ 7.
The XLL+ Upgrade Wizard can also be used to upgrade projects created with a different version of Visual Studio. Project build settings that are affected by Visual Studio version will be modified to work with the active version of Visual Studio.
Upgrade Wizard
There are three steps to upgrading a project built with an older version of XLL+.
-
Open the project or solution in Visual Studio, and, if the project is under source control, check out the project file and source files.
-
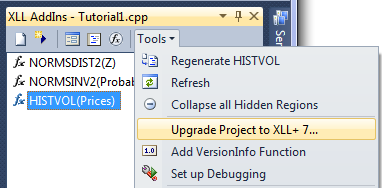
In the XLL Add-ins window, click on the Upgrade Project to XLL+ 7... command, located on the Tools menu.
-
Check the upgrade report, and rebuild the project.
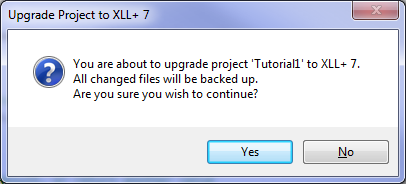
Running the Upgrade Wizard is simple. Just click Yes on the confirmation dialog.
When the Wizard has finished running it will open a browser window to display the XLL Plus Upgrade Wizard Report. Examine this to see if any errors were reported.
If all went well, your project is now ready to be rebuilt and run. Your existing add-in functions can take advantage of all the new features of XLL+ 7 and of Excel 2010.
Note: Running the Upgrade Wizard a second time on a project will not harm it. The wizard only changes code and project settings once.
Changes made by the Wizard
The wizard makes changes to the project settings and to the source files that contain XLL+ add-in functions.
A backup directory is created below the project directory, and copies of all changed files are stored there. By copying these files back to the project directory, you can reverse all changes made the Upgrade Wizard.
Project Settings
The following changes are made, if necessary, to the project settings:
| Tool | Setting | Change |
|---|---|---|
| General | Platform | 64-bit builds are added to the solution and to the project. |
| C/C++ | Additional Include Directories | The directory containing the XLL+ 7 header files is added, at the start of the list. If a directory containing the XLL+ 6 header files is found, it is removed from the list. |
| C/C++ | Enable C++ Exceptions | Set to "Yes With SEH Exceptions (/EHa)". |
| Linker | Additional Library Directories | The directory containing the XLL+ 7 library files is added, at the start of the list. If a directory containing the XLL+ 6 library files is found, it is removed from the list. |
| Linker | Force Symbol References | For 32-bit builds, the symbol _DllMain@12 is added, at the start of the list.
For 64-bit builds, the symbol DllMain is added, at the start of the list. |
| Resources | Additional Include Directories | The directory containing the XLL+ 7 header files is added, at the start of the list. If a directory containing the XLL+ 6 header files is found, it is removed from the list. |
| Debug | Command | Set to call the Excel executable file (as specified in the DefaultExcelExe setting). |
| Debug | Command Arguments | Set to "$(TargetPath)", so that Excel immediately opens the project's XLL file. |
Add-in functions
The following changes are made, if necessary, to files containing add-in functions:
| Location | Change |
|---|---|
| IMPLEMENT_XLLFN3 | The macro is replaced by IMPLEMENT_XLLFN4.
New arguments supporting Excel 2010 are added, and the pszExt12
argument, which contains a full definition of the add-in function's signature
and behavior, is regenerated. |
Note that your existing code, outside the //}}XLP_SRC delimiters,
is completely unchanged. With the exception of the special cases listed under
Breaking changes, it will compile and run
immediately, with no changes in behavior.
Report
An upgrade report is generated and saved in the backup directory
as UpgradeReport.html.
The report contains details of all actions performed by the Wizard.